Did you or someone you care for just have shoulder surgery? Are you struggling to figure out how to get dressed after shoulder surgery?
Or maybe you found out you need shoulder surgery and are trying to prepare for how you are going to get dressed.
While your body heals from surgeries such as a rotator cuff repair, you might not be able to move it, and dressing after shoulder surgery might be challenging.
Luckily, I’ve worked with a lot of shoulder surgeries and injuries over the years. I’ve prepared a few things you can wear and steps you can take to make getting dressed after shoulder surgery easier.
This post will provide details about how to dress and undress safely following shoulder surgery or injury requiring the immobilization of the shoulder joint. We’ll talk about equipment, techniques, and safety considerations to maximize your independence with the dressing process!
If you prefer a video how-to, please check out my video on my YouTube Channel!
Disclaimer: Always talk to your medical professional before deciding or changing the medical equipment that you utilize and how you should use it.
Please note: Before we begin, you need to make sure you follow all the instructions and warnings provided by the manufacturer. The steps below are only to provide guidance with installing or assembling equipment, but you should always follow the warnings and instructions provided by the manufacturer and always speak with your medical team before adding new equipment to your routine.
Overview
- Products
- What to Wear After Shoulder Surgery
- What to Wear If You Cannot Remove Your Arm From the Sling
- Equipment Needed for Dressing
- How to Undress After Shoulder Surgery
- How to get Dressed After Shoulder Surgery
Products
Juvo Dressing Stick
Sling Shirt (Open Shoulder Design)
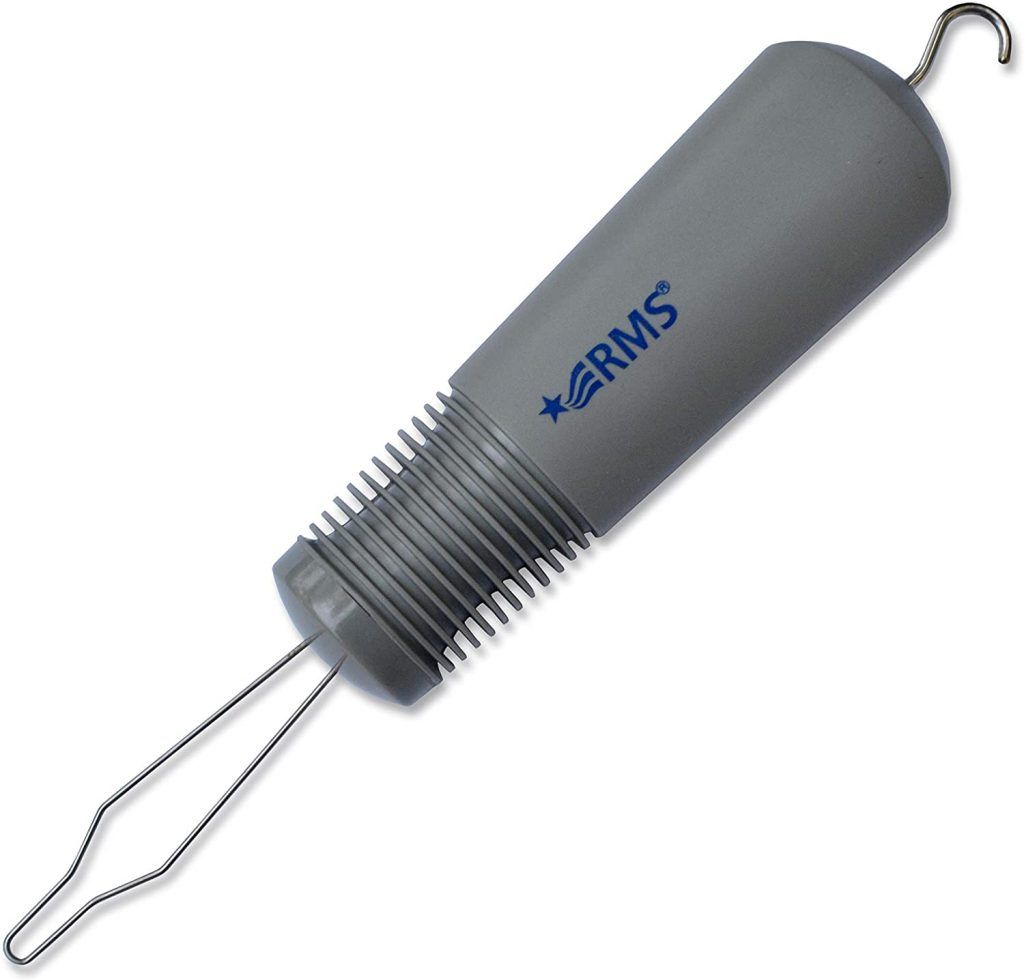
Button Tool
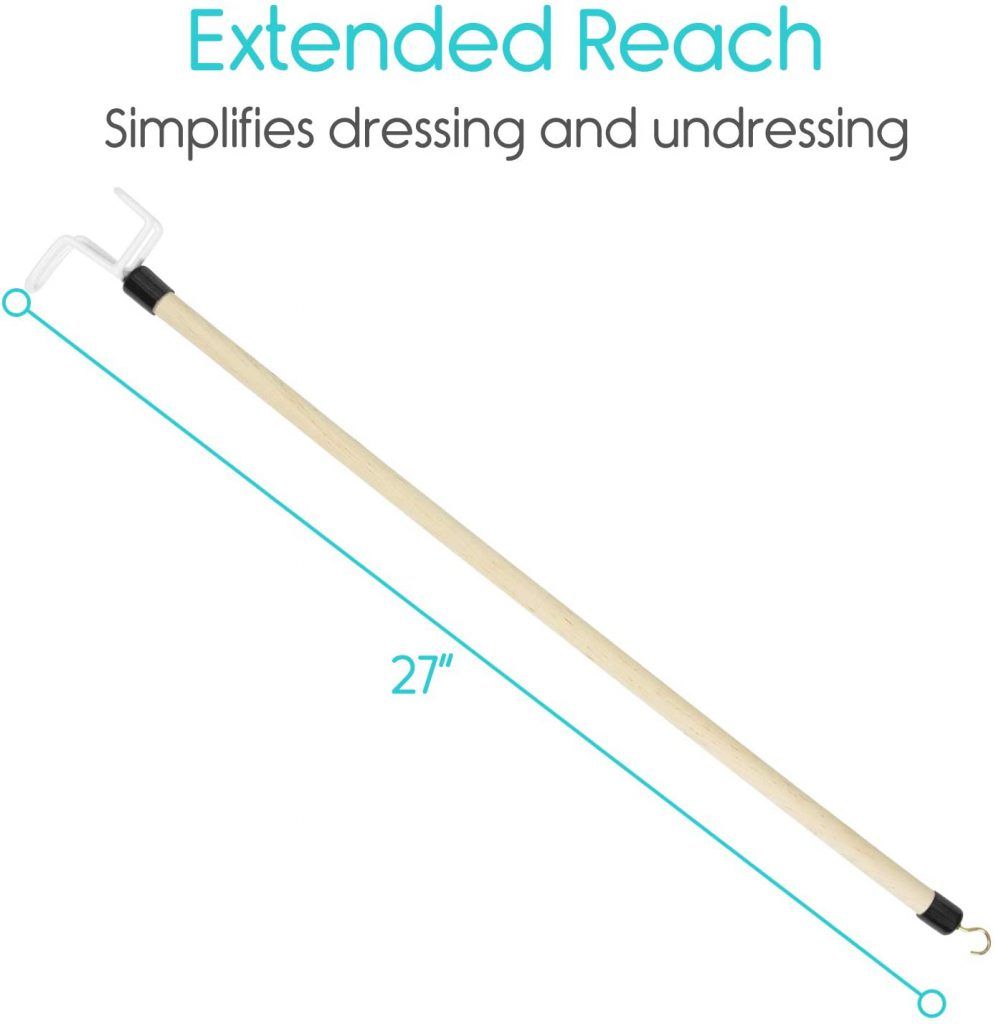
Standard Dressing Stick
What To Wear After Shoulder Surgery
Let’s start with something that will make dressing after shoulder surgery much easier…what to wear after shoulder surgery. Loose, stretchy, comfortable clothing will be the key when dressing after shoulder surgery. This advice may seem simple, but you would be amazed how often we overlook these simple things. You may want to take a look through your closet and see if that favorite shirt of yours is actually loose-fitting.
Don’t forget to check different articles as well. Even things like socks are essential to think about when recovering from shoulder surgery. All forms of clothing should be loose-fitting, have a few buttons/zips/snaps, and have elastic. Planning to wear this type of clothing up-front will make the energy and time required for getting dressed after should surgery much less.
What To Wear If You Cannot Remove Your Arm From Sling
If a physician tells you that you are not allowed to remove a sling, removing your clothes will be very difficult, but not impossible.
In these cases, you might consider buying modified clothing.
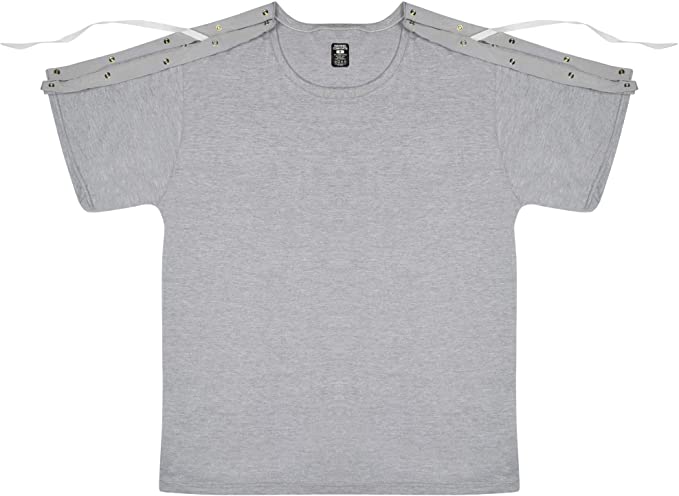
Modified clothes, such as the example above, will have an open shoulder that will allow you to dress without ever removing the sling from your body. While still not a wide selection, modified clothes are available from online shops like Amazon and makers on Etsy. I have known some people to make or modify their own clothing as well.
Equipment Needed For Dressing After Shoulder Surgery
Aside from clothing, there are a few pieces of equipment that can be helpful in getting dressed after shoulder surgery. For most people, the most helpful tool is a dressing stick. If you know me, you know I love the Juvo dressing stick. Among its many delightful details, I love that it has a shoe horn on one end as well as a hook with sticky rubber on the other end.
But the Juvo is not the only dressing stick in this category. There’s another dressing stick option that is more like a wooden dowel with a rubber grips at one end.
Why Use a Dressing Stick after Shoulder Surgery?
You may be asking this very question and it’s a fair one. Dressing sticks can be very helpful when putting on clothing like jackets, sweaters, etc. Dressing sticks can provide extended reach and prevent overuse of your non-surgically repaired or injured side.
If you are going to be in a recovery position for a long time and need to be able to return to work where a button-down shirt is required, you may also need a one-handed buttoning tool. Buttoning tools are low-cost and can be helpful if you need to button a shirt or blouse following shoulder surgery.
How to Remove an Arm Sling After Shoulder Surgery
OK, let’s say that you can remove your arm sling, how do you do that safely?
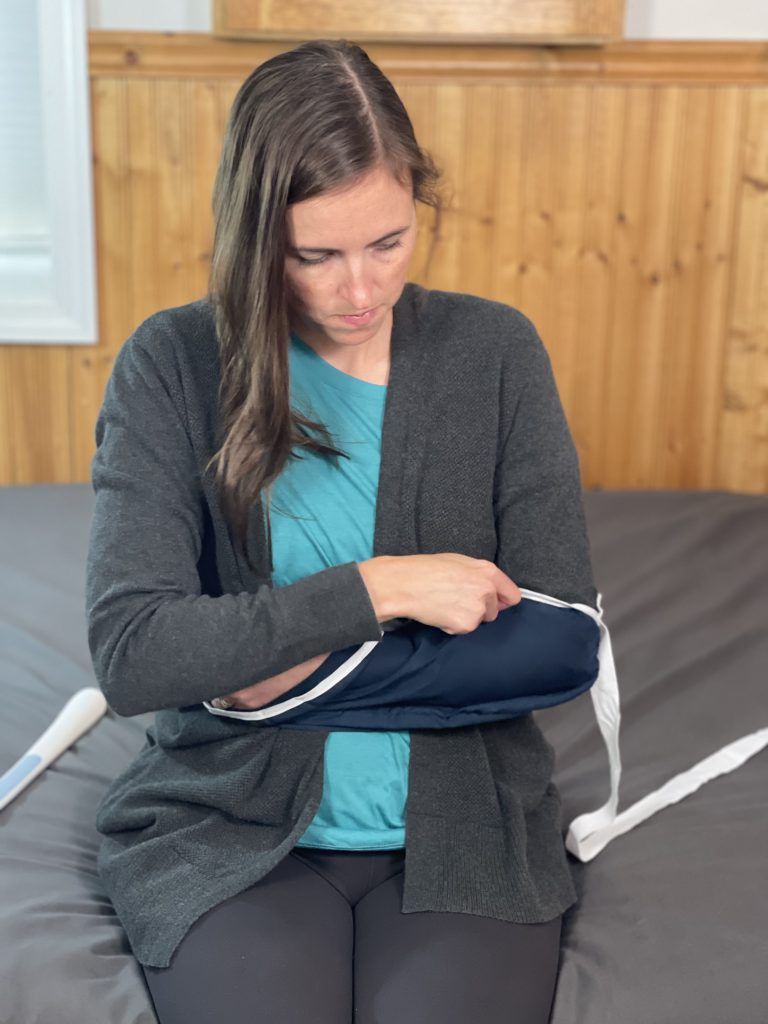
Before you begin to take off clothes after shoulder surgery make a mental note of the position of your arm. Feel where the hand of your injured or repaired arm is. You’ll want to keep it there the entire time you are getting undressed. What we are trying to do is make sure your surgically-repaired shoulder does not move throughout the entire process.
Note: Having a mirror in front of you while performing this task can help you monitor the position of your hand, arm, and shoulder throughout this entire process.
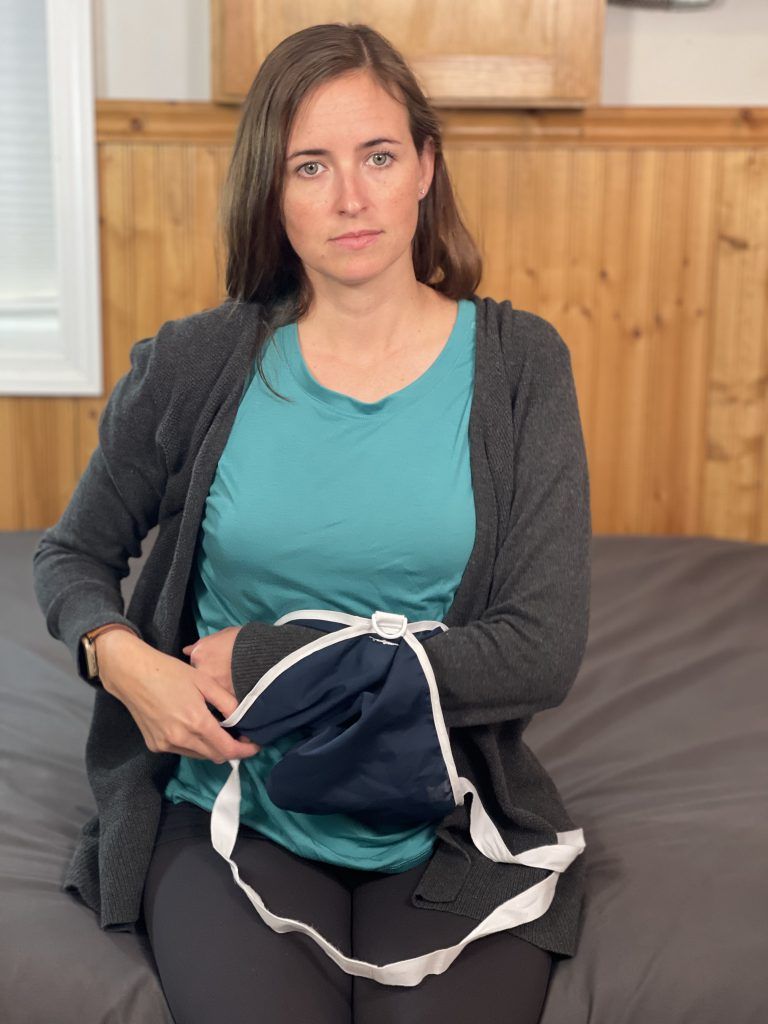
The first step is un-velcro the shoulder support strap and take it out of the loop and remove it from your shoulder. If your sling has a waist support, you’ll need to un-velcro and remove that as well.

Then, keeping your injured arm still and in the same position, use your uninjured hand to remove the sling from your injured arm.
How To Undress After Shoulder Surgery
OK, you’ve got the sling off. Now, how do you undress the rest of the way? Like remove a shirt or sweater?
Well, there’s a couple of different ways depending on the type of clothing.
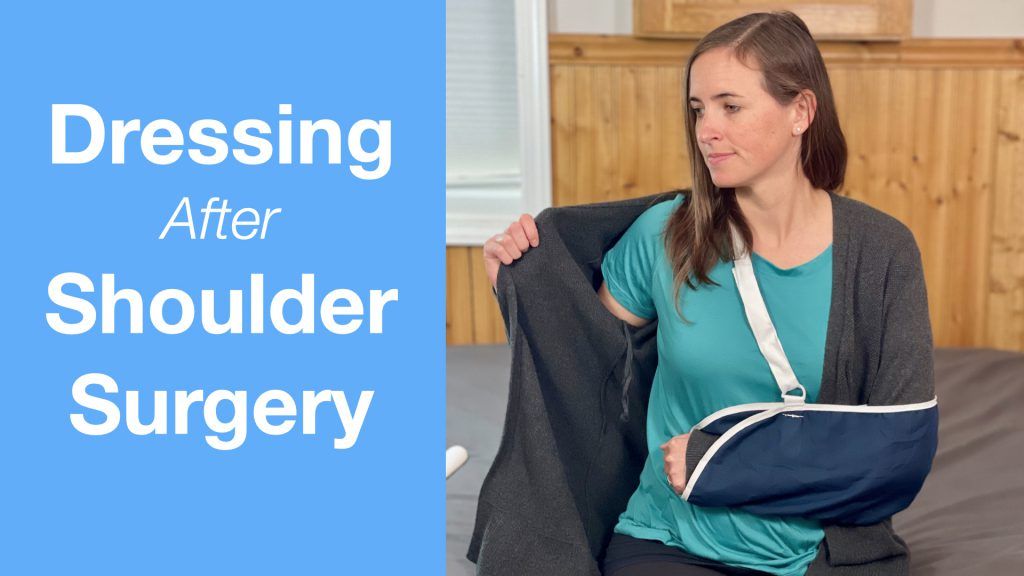
For example, if I’m wearing a loose-fitting sweater with no buttons or zippers fastened, I’ll remove it from my non-injured shoulder first, like the example below.
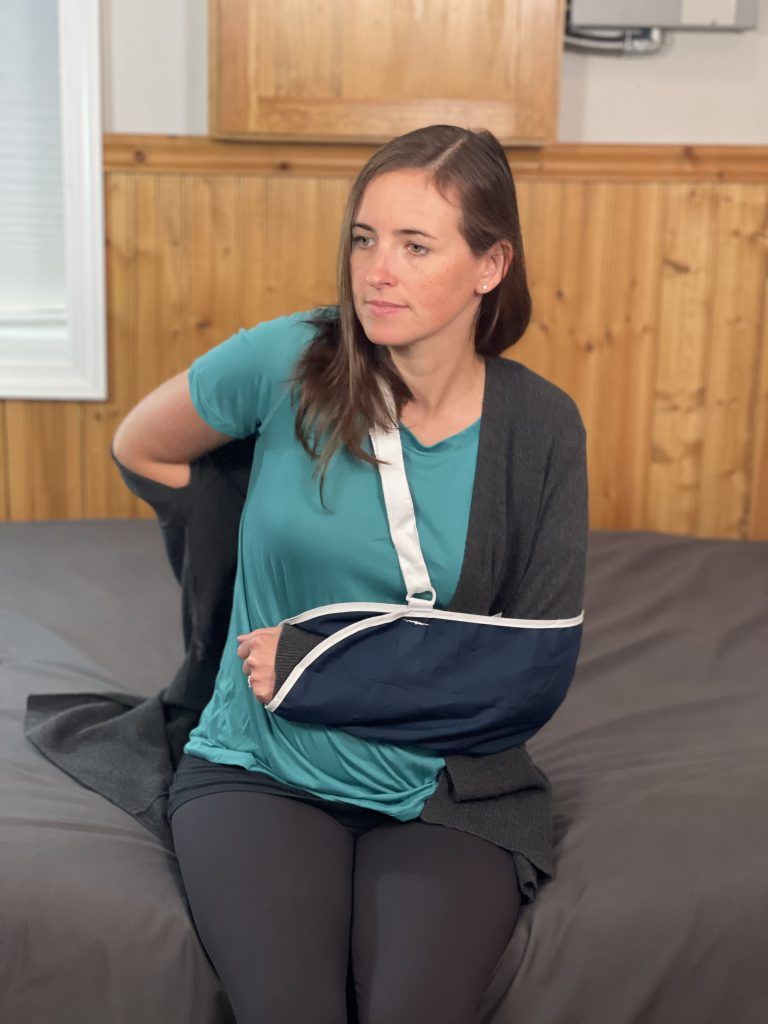
Then, using my non-injured arm, I’ll remove the sweater from the other shoulder, maneuvering it down to my elbow.
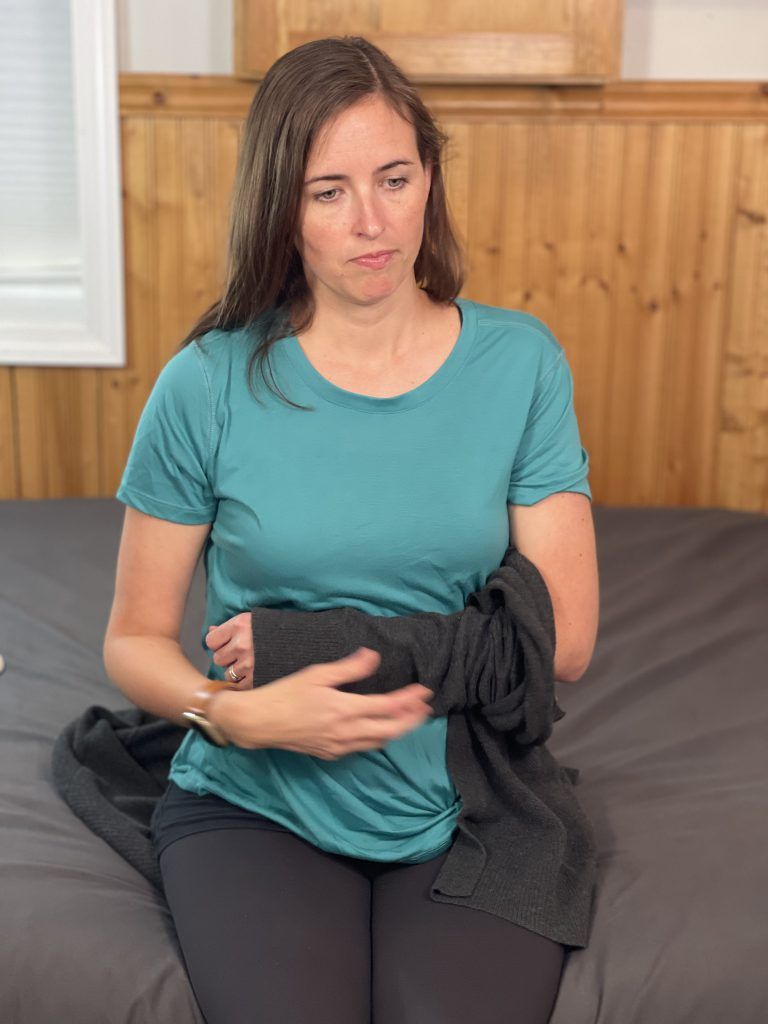
I’ll pull the cuff by my wrist and pull the rest of the sweater off.
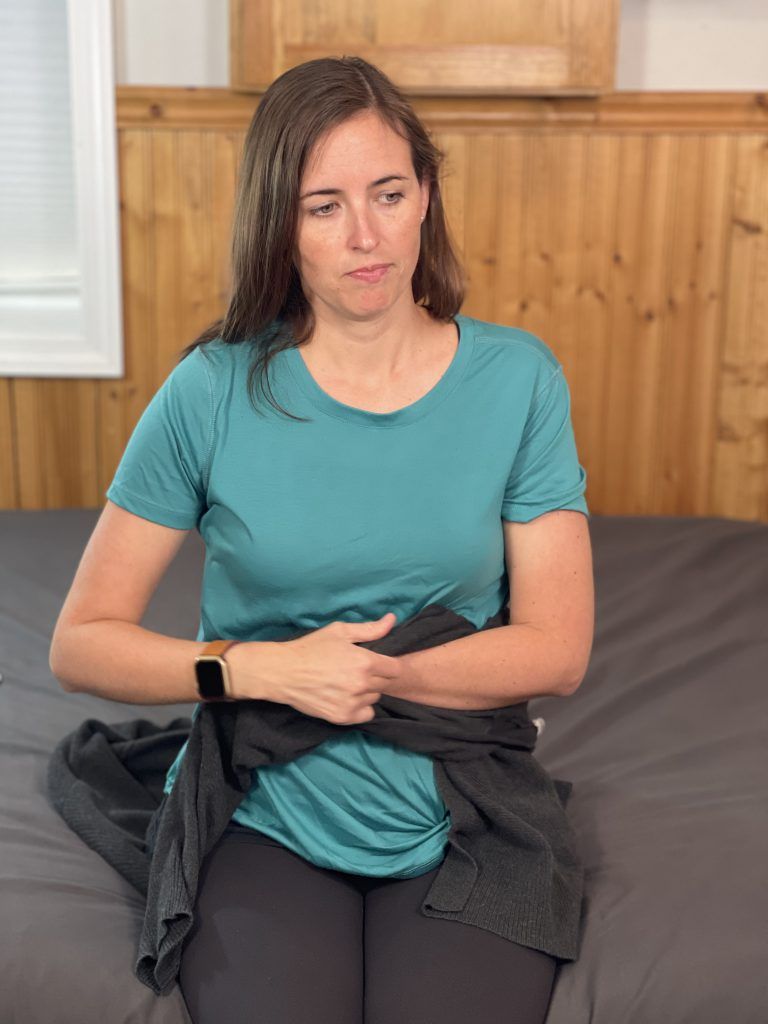
Removing a t-shirt can be much more difficult, but the process can still be completed safely. First, you’ll maneuver the bottom of the shirt up to your abdomen to a point above your injured wrist area.
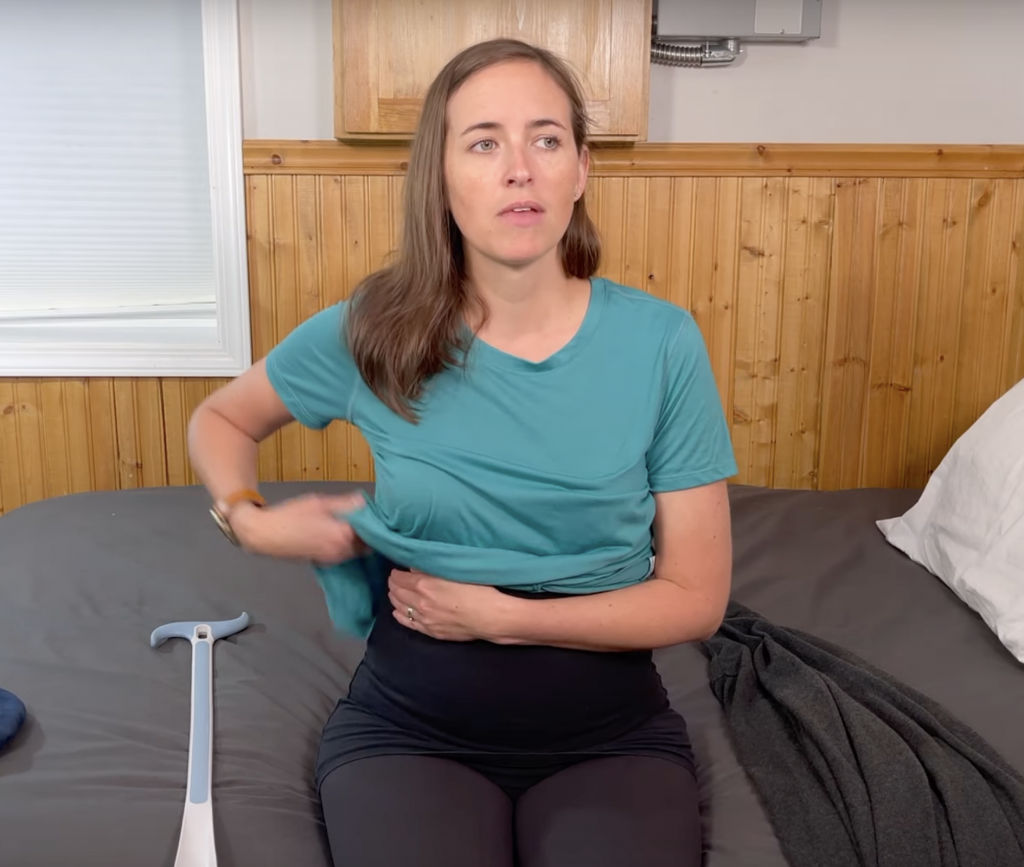
You’ll try to bunch the shirt just under your chest and above your stomach. This should allow you to perform the next step, removing the shirt from above. I like to remove t-shirts is to grabbing the back of the collar and pull directly up, over my head. Since the material is bunched above my injured arm/wrist, there is plenty of slack to pull the shirt up over my head.
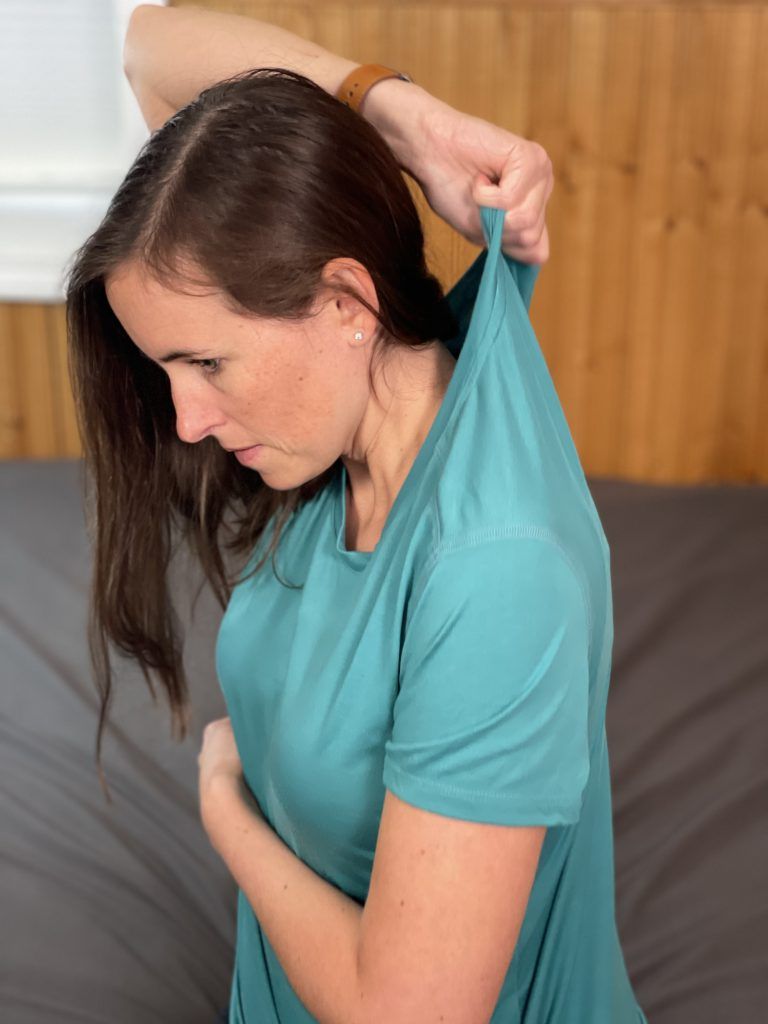

Finally, I need to slide the short off the shoulder, down around the injured arm, and off.

How to Get Dressed After Shoulder Surgery
To get dressed, we’re going to choose loose, stretchy clothing. In this case, my t-shirt is soft and stretchy. The first step is to lay the shirt down on your lap in the correct orientation. This step prevents getting the shirt twisted while putting it on, which can be dangerous.
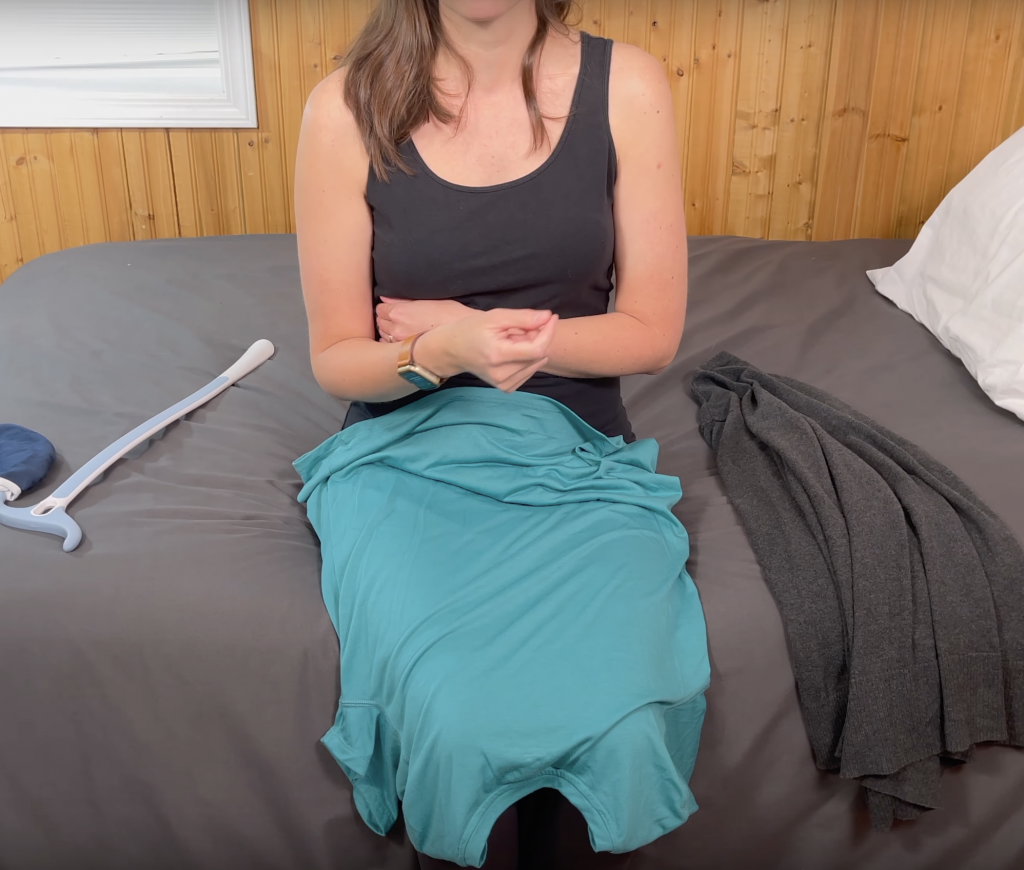
In its flat position, I’ll bunch the shirt starting from the bottom up to the sleeve of my injured arm.
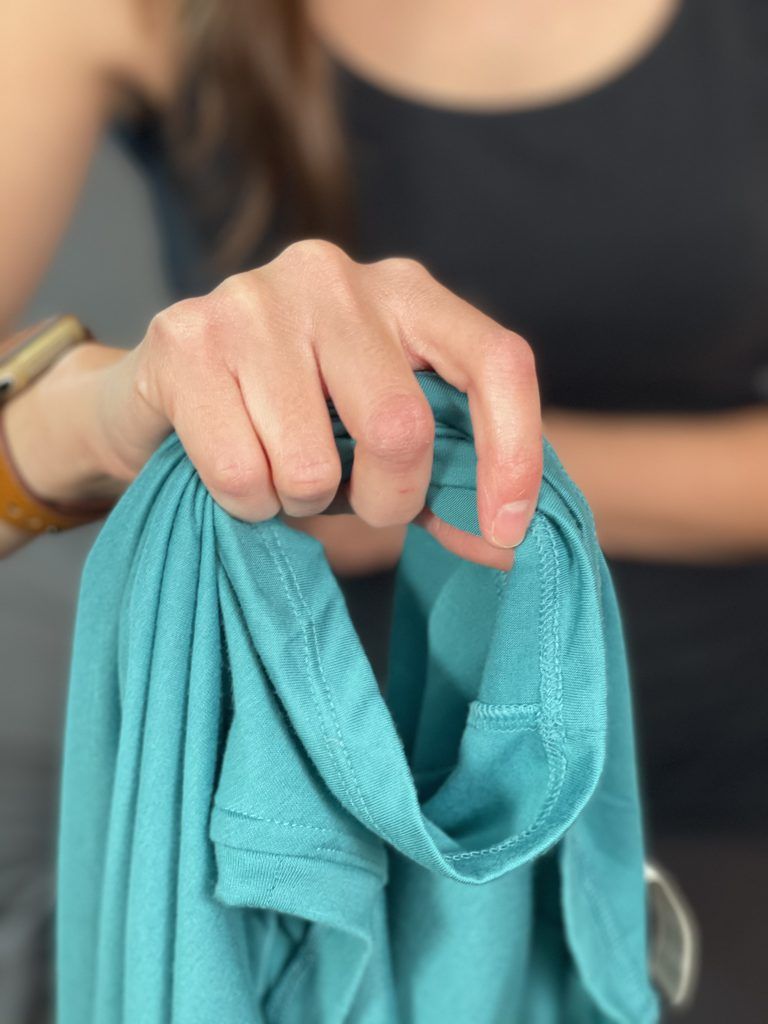
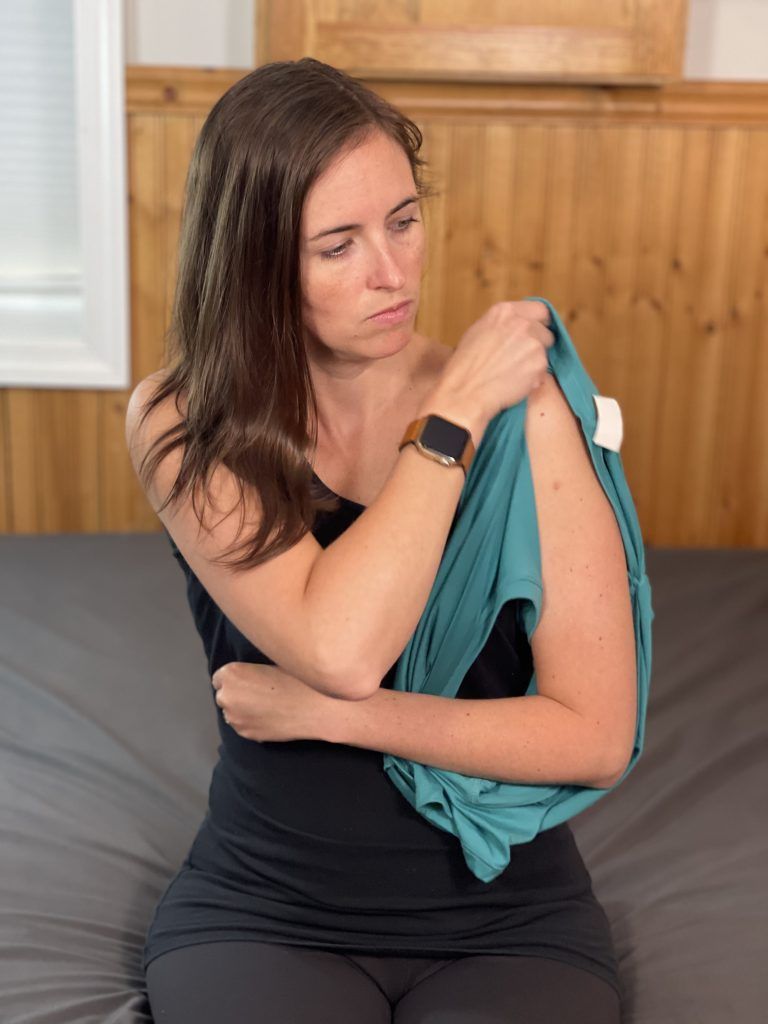
I’ll thread my injured arm through the sleeve I bunched up to the shoulder.

Next, I’ll find the neck hole and place that over my head. Again, having a stretchy shirt is helpful here.
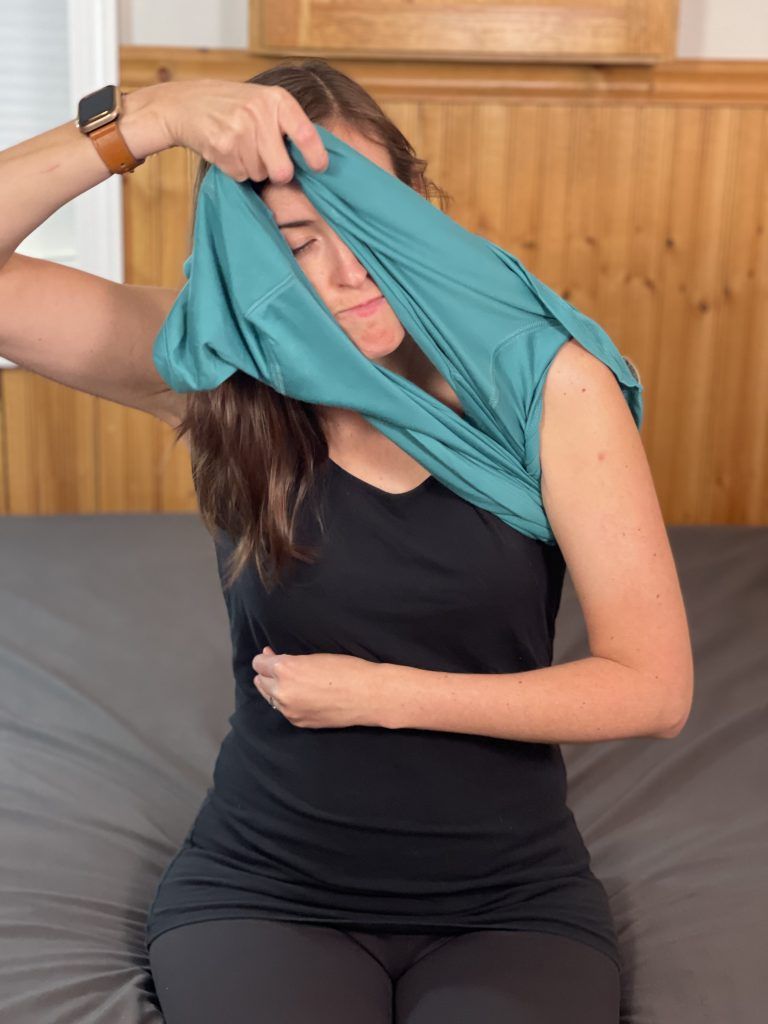
After that, I’ll put my non-injured arm into the shirt and get the shirt into its proper place around my shoulders. The final step is to gently pull the shirt down my abdomen, under my injured arm, and finish the process.
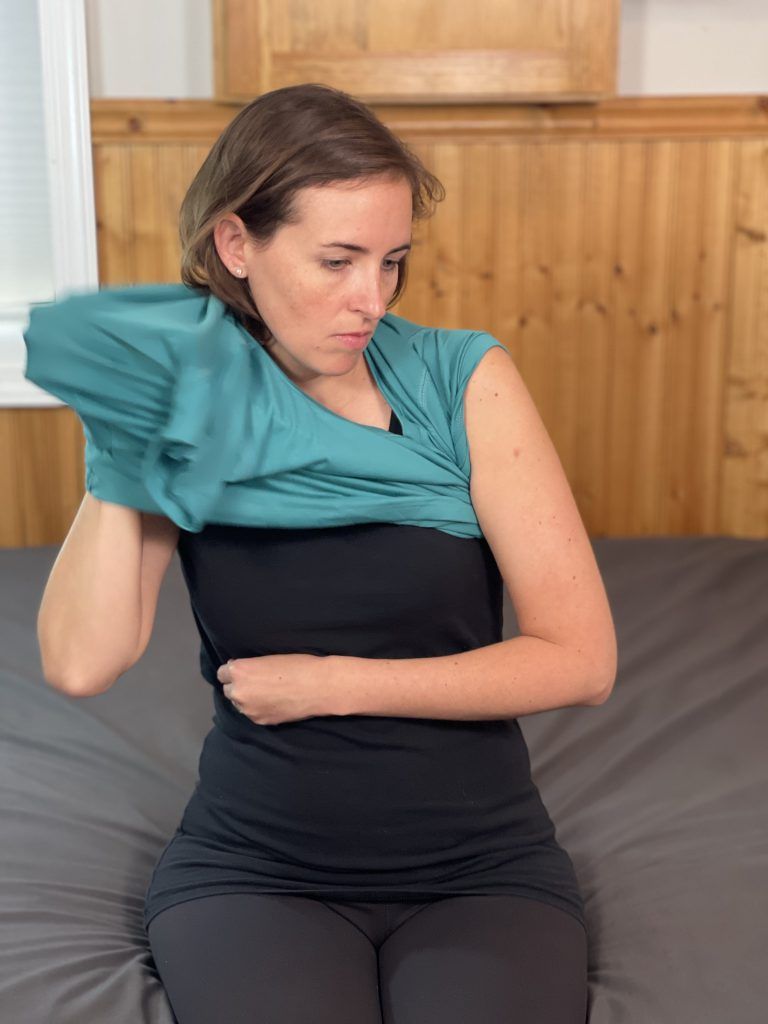
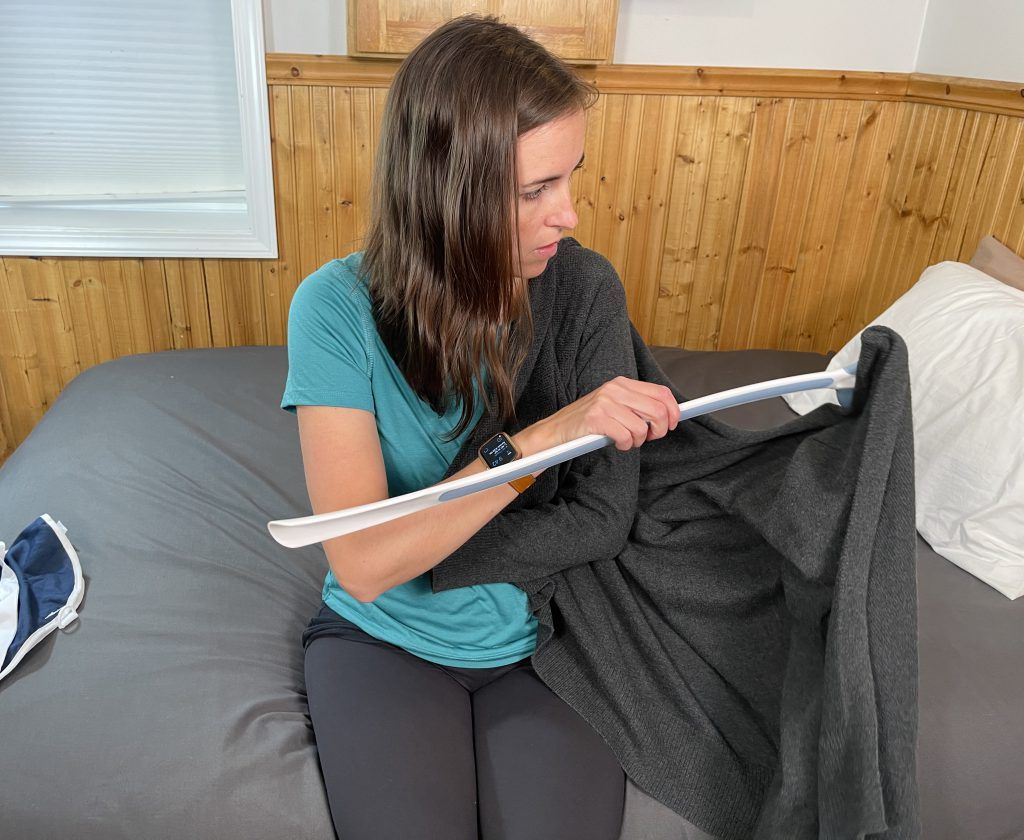
Adding an over shirt or sweater is a similar process, but for this, I’ll use a dressing stick. We’ll start the same way, laying the sweater on my lap. I’ll bunch the sleeve up for my injured arm first and slide my arm through the sleeve.
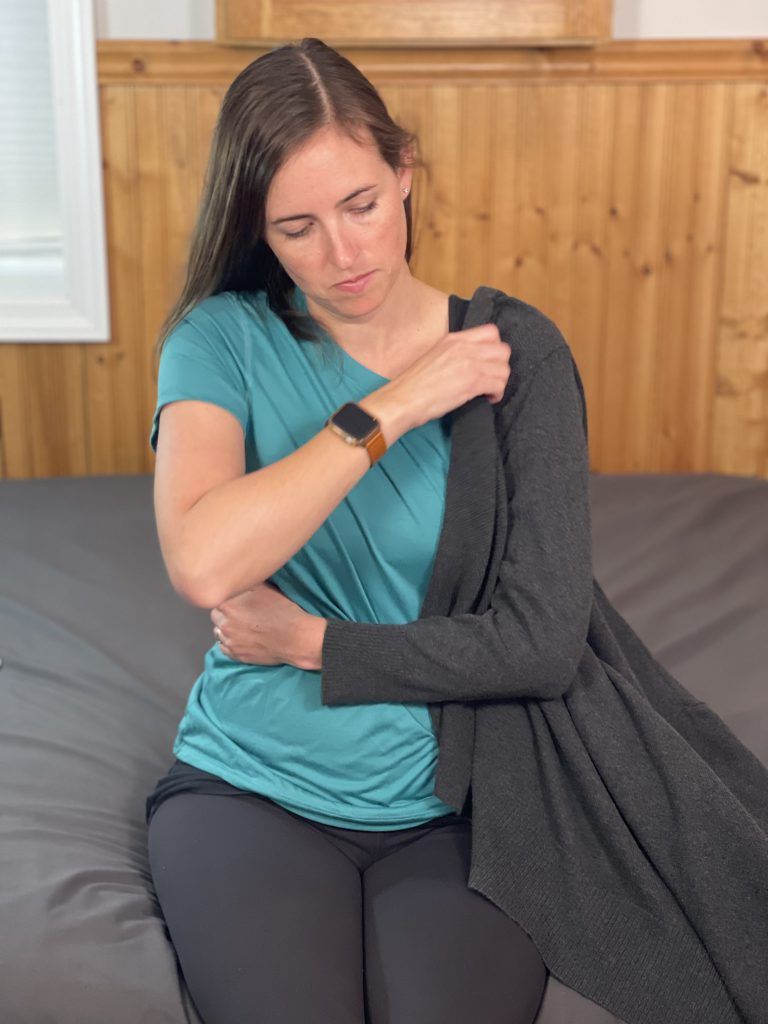
Once my sleeve is on my arm, I’ll fold the sweater back in front of me, hook the dressing stick into the shoulder of my sweater and maneuver it behind my back, so I can place my arm into the sweater as I typically would.
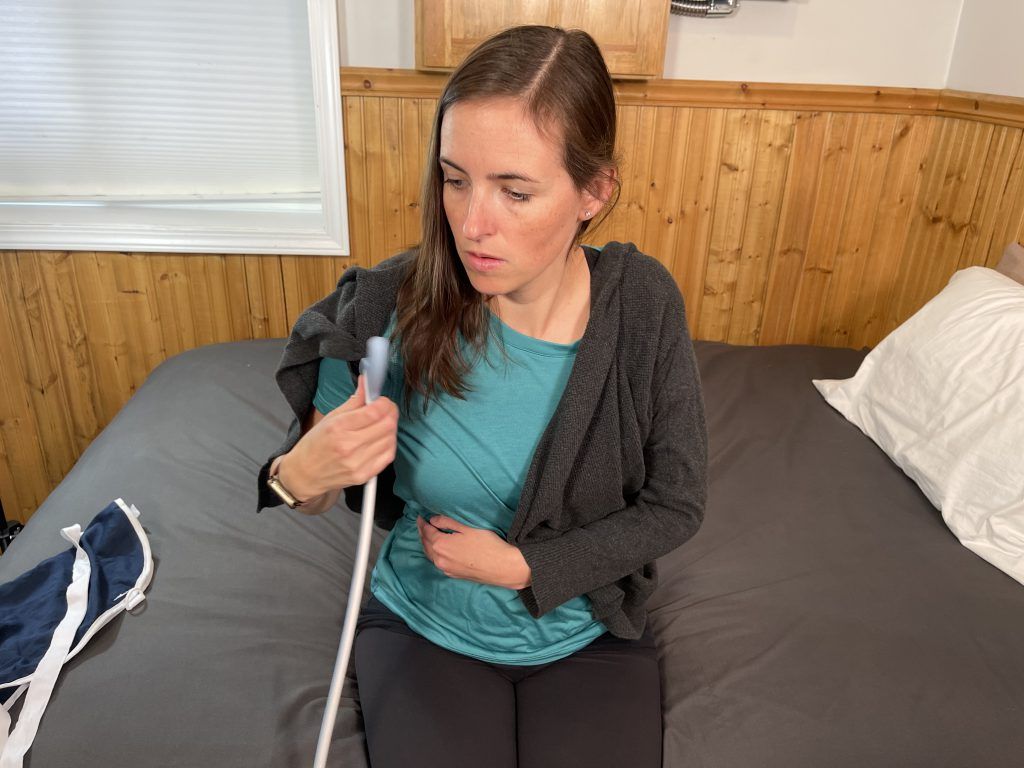
The final step is to reapply your sling. Be gentle and follow the sling instructions and you’ll be all set!
*all prices are at the time of publishing
Note: This post contains affiliate links that provide a small commission without any added cost to the user.
More Posts
- How to Sleep After a C-Section or Abdominal SurgeryRecovering from a C-Section, appendectomy, abdominoplasty, or other abdominal surgery can feel overwhelming, especially when it comes to something as essential as sleep. With a tender incision and limited mobility, finding a comfortable position may seem impossible—and yet, proper rest is critical for healing! In this …
How to Sleep After a C-Section or Abdominal Surgery Read More »
- How to Get In and Out of the Car after Hip ReplacementGetting in and out of a car after a hip replacement can feel like navigating an obstacle course. Ensuring you move safely and avoid unnecessary strain on your healing hip is essential for a smooth recovery. Whether you’re heading to a follow-up appointment or simply enjoying …
How to Get In and Out of the Car after Hip Replacement Read More »
- A Complete Guide to Lower Body Dressing After Hip Replacement SurgeryRecovering from hip replacement surgery (or similar traumatic injury) comes with its challenges, especially when it comes to everyday tasks like getting dressed. While your mobility may be temporarily limited, dressing your lower body can be made much easier with the right strategies and tools. This …
A Complete Guide to Lower Body Dressing After Hip Replacement Surgery Read More »
